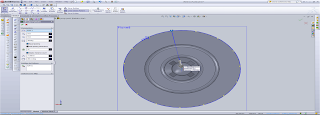
The piece below is the passage where the soap passes through as the pump is maneuvered. The passages are where the cuts on the piece are shown, as well as the highlighted area, which is just about to be cut through. I hid the surrounding tube piece so that this process of making this part was easier to see and simpler to build.
Below is the section view through the tube piece. If you look closely you can see that the part I had just been creating in the previous image is in its correct position. I find the section view to be very helpful in understanding the full dimensioning of the part your creating.
Now that the basic structure of the pump tube has been completed I then finished off the very top of the tube with a few extruded cuts to represent the soap bottle I was modelling. In the image below, you can see through the centre of the tube representing the piece I was modelling two images above.
Now that the first part of the pump action bottle was complete (The tube piece), it was time to progress through and complete the other required parts of the bottle. In the image below I created three quarters of a circle, used the swept/boss base feature to create the bottom of the spring. Going through the lecture which showed the process of creating the spring was very helpful in this section of the bottle.
I managed to create a plane at one end of the three quarter circle part and then draw a helix with the desired amount of revolutions and height of the pitch. Once I had created it, I then created a plane at one end point of spiral and used the swept/boss base feature to model the spring. The image below is the final representation of the spring.
I'm now at the stage of creating the top piece of the bottle. In the image below you can see underneath the top piece. Firstly to create the main top piece structure I used a series of lofts and guide curves to create the desired shape. From there I extruded a cylinderical pipe which will lead to the main tube piece of the bottle.
Progressing through the top piece of the bottle still I have detailed the cylinderical part with a series of cuts and fillets to match the bottle. The tools which I used throughout this section of modelling was the convert entities and offset entities. These tools made the progress of this bottle a lot more accurate and precise.
Finally completely each of the four parts which make up the the pump action bottle I'm now at the stage of creating an accurate assembly of the parts. In the image below, I have been able to carefully mate each piece together successfully.


No comments:
Post a Comment